By default, Windows 10 shows background pictures on your lock screen that have been curated specifically for this use–but it’s not immediately clear where they’re stored. Windows replaces these images regularly, but if you want to use them as regular wallpapers, the last several are usually in that cache and are not too hard to save if you grab them in time.
Many of you may have disabled Spotlight images on your lock screens because Microsoft will slip the occasional ad in there, but if you haven’t, you’ll notice that the ads are pretty rare, and the Spotlight images are often really nice. Also note that we’re talking here about background images for the lock screen–that page you have to click or slide out of the way to get to the login screen. You can actually set background images for your login screen separately.
RELATED: How to Disable Ads on Your Windows 10 Lock Screen
First: Enable Spotlight Images on the Lockscreen
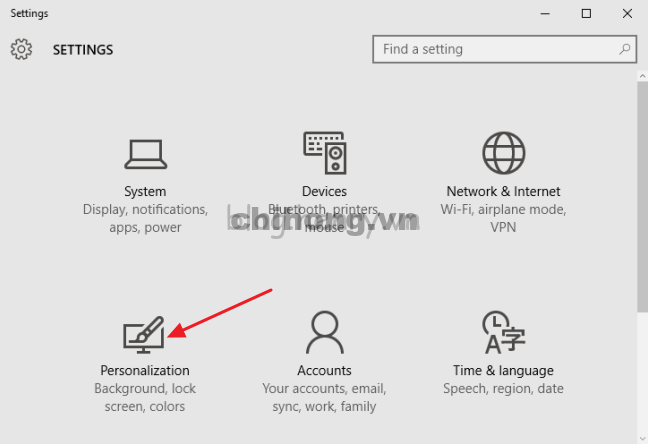
If you’ve turned Spotlight images off (or you’re just not sure), it’s easy to turn them on again. Just click Start and then choose Settings (or hit Windows+I). On the Settings screen, click Personalization.
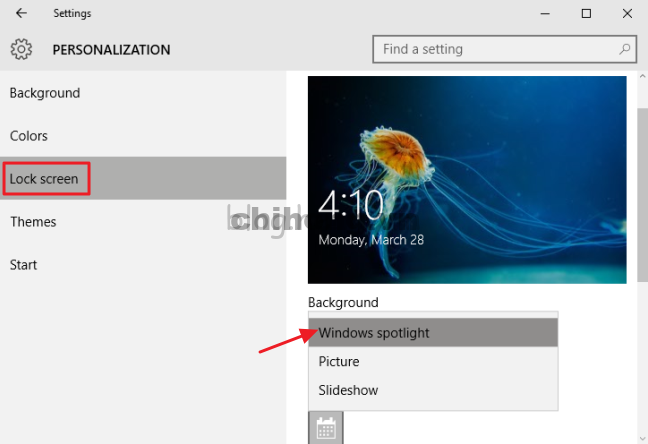
In the Personalization window, select the “Lock screen” tab and then on the Background drop-down menu, choose “Windows spotlight.”
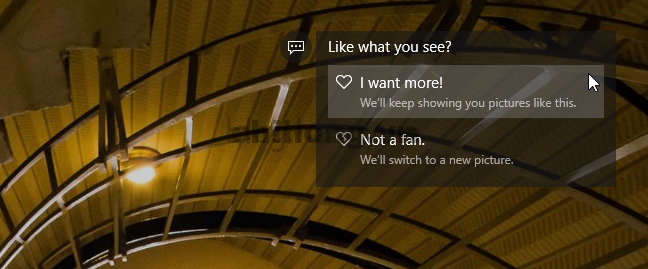
When you first turn on Spotlight, it will take a few restarts (or returns to the lock screen) to build up some images in your cache. On the lock screen, you can nudge Spotlight towards the types of images you enjoy. When you see something you like, just click “Like what you see?” and then click “I want more!” to see more images like the current one in the future.
How to Save Spotlight Images
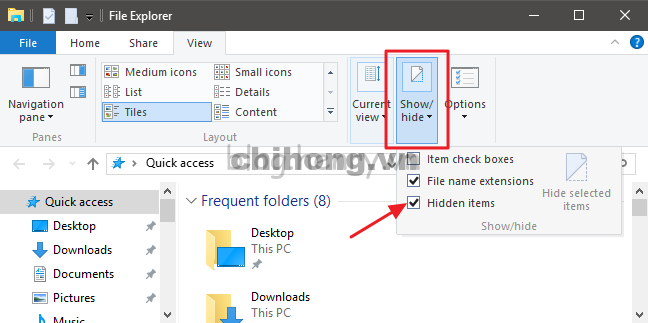
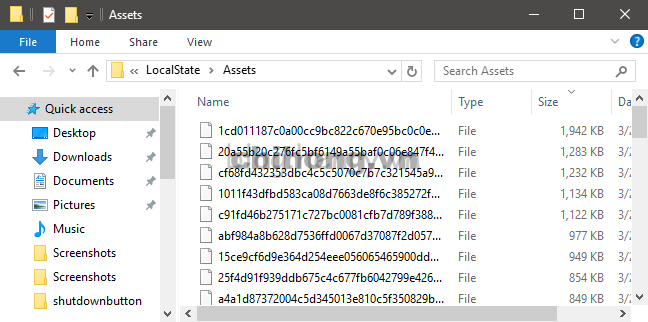
After Windows has had time to save up a few Spotlight images, you can find them buried in your user folder. First, you’ll need to make sure you’re seeing hidden folders. In File Explorer, switch to the View tab, click “Show/hide,” and then enable the “Hidden items” check box.
Next, navigate to the following folder (or just copy the path below and paste it into the File Explorer address bar):
%userprofile%\AppData\Local\Packages\Microsoft.Windows.ContentDeliveryManager_cw5n1h2txyewy\LocalState\Assets
Note that the %userprofile% part of that path automatically jumps you to the user folder for the currently logged in user (by default at C:\Users\<username> ). In the folder, you’re going to see a whole bunch of files with long, meaningless file names and no extensions. Some of these are the image files you’re looking for; many are not.
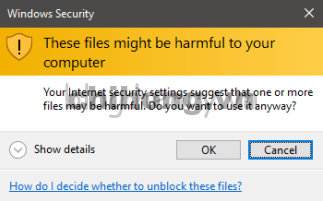
Instead of working with these files directly in the Assets folder, you’re going to copy them somewhere else. Just create a new folder anywhere you like, select all files in the Assets folder (Ctrl+A is the quickest way), and then copy them to the new folder. When you do this, Windows will warn you that some of the files may be harmful to your computer. This is just because you’re moving them from a system folder and Windows doesn’t recognize the file types (since no extensions are assigned). Click OK to finish copying the files.
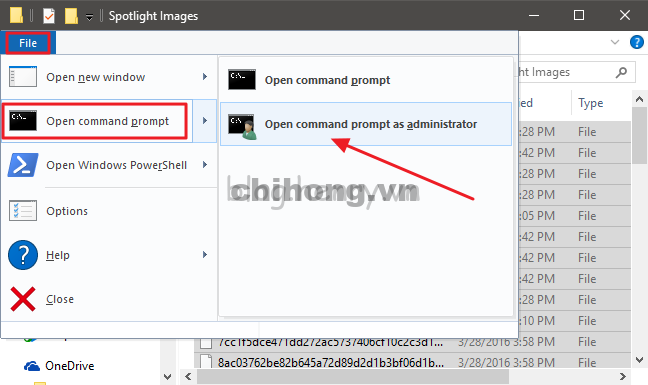
In the new folder with the copied files, you’re now going to rename all the files to include a JPG extension. The easiest way to do that is with the Command Prompt. In the File Explorer window, with your new folder showing, click File > Open Command Prompt, and then choose “Open command prompt as administrator” to open the Command Prompt at your current location.
At the Command Prompt, type (or copy and paste) the following command and hit Enter:
ren *.* *.jpg
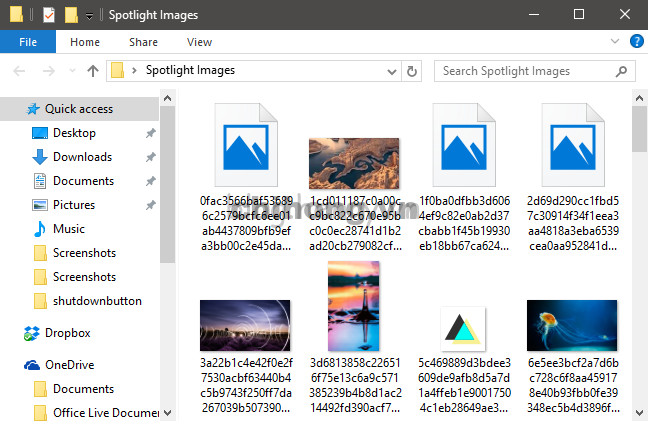
This command renames all files in the directory to their current name plus the .jpg extension. Exit the Command Prompt and refresh the folder you’re working with (F5). As you can see, some of the files now have thumbnails. Those are the actual image files. You can go ahead and delete everything that doesn’t have a thumbnail to get it out of the way.
Of the actual image files that are left, you’ll see a few types. Some of the smallest files are just image assets that might be used for things like app icons or displays. You can just get rid of those, too. The portrait-oriented images may be interesting to you for use on a smartphone. And the widescreen images are the actual lock screen images you’re after. Put them into a folder with your other wallpapers and you’re good to go!
Source: howtogeek

